chimney inspection

Chimney Inspection Matters: The Secret to a Safer, Warmer Home

A roaring fire may be the heart of your home in winter, but behind every cozy moment is a chimney working hard to safely vent smoke and gases. Unfortunately, this unsung hero is often overlooked—until something goes wrong. That’s why a chimney inspection is not just smart, but essential.

In this article, we’ll explore when and why chimney inspections should be on your calendar, what professionals look for during an inspection, and how keeping up with maintenance ensures safety, efficiency, and peace of mind.


Why Chimney Inspections Are a Must

Fire Safety Starts at the Flue

Each time you light your fireplace, a byproduct of combustion—creosote—builds up along the chimney walls. Over time, this highly flammable substance can ignite, leading to devastating chimney fires. A proper chimney inspection identifies such buildup early, preventing potentially dangerous situations before they escalate.

Even if you don’t use your fireplace often, weather-related damage, nesting animals, or unseen blockages could compromise safety. That’s why inspection isn’t just about cleaning—it’s about proactive fire prevention.

Protect Indoor Air Quality

A damaged or blocked chimney can release smoke, carbon monoxide, and other pollutants into your living space. These invisible dangers can cause serious health issues for you and your family. An annual chimney check ensures harmful gases are safely vented outside, keeping your indoor air clean and breathable.

Avoid Costly Repairs

Catching small issues early is significantly cheaper than dealing with major repairs later. For instance, a cracked liner or deteriorating masonry can be addressed quickly if spotted during a routine check. This not only saves you money but helps extend the life of your chimney system.

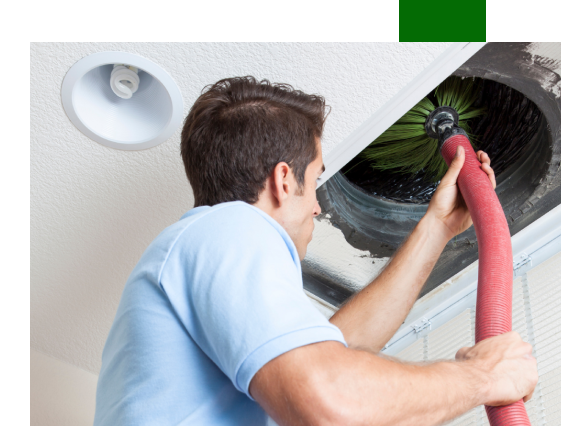
Modern tools used in chimney inspection services—like video scanning and diagnostic software—allow for a detailed look at your system, uncovering issues that may be invisible to the naked eye. Many professional services now incorporate such technology as part of a thorough inspection.


When to Schedule a Chimney Inspection

Annual Inspections Are a Must

The National Fire Protection Association recommends that chimneys be inspected at least once a year. This applies even if you use your fireplace occasionally. Regular usage increases creosote buildup, while infrequent use leaves your system vulnerable to animal intrusion and weather damage.

Before Buying or Selling a Home

A chimney inspection is crucial when buying a new home or preparing to sell one. You want to ensure the fireplace is functional and safe. A level 2 inspection is often required during real estate transactions, offering a detailed overview of the chimney’s condition—including hidden damage or structural weaknesses.

After Major Weather Events

Heavy rain, snow, or high winds can damage your chimney’s masonry or crown. If your home has experienced extreme weather, it’s wise to schedule a post-storm inspection. Catching cracks, leaks, or displaced bricks early can prevent water intrusion and long-term structural issues.

If you live in coastal or high-moisture areas, experts recommend seasonal inspections with cleaning options, such as those offered by professional chimney cleaning service providers, to address the unique wear-and-tear caused by salty air and humidity.


What Happens During a Chimney Inspection?

Level 1, 2, and 3 Inspections Explained

  • Level 1: The most common type, ideal for regularly maintained systems. A visual check of the chimney interior and accessible parts of the fireplace or stove is conducted.
  • Level 2: Required when changes are made to the system (like switching fuel type), after a house sale, or if there’s been weather damage. It includes video scanning of the flue and a more in-depth look at the structure.
  • Level 3: The most extensive, usually done when serious issues are suspected. It may involve removing parts of the chimney or surrounding walls to inspect hidden areas.

Technology Enhances Accuracy

Today’s chimney inspections are aided by advanced tech tools. Infrared imaging, live camera feeds, and even drone-assisted visuals are becoming common. Many professionals use platforms like this one to offer clients a digital report with images, videos, and a breakdown of recommended actions.

Clear Reporting and Next Steps

Once the inspection is complete, homeowners receive a detailed report outlining findings and next steps. If cleaning, repairs, or component replacements are needed, you’ll have the data to make informed decisions quickly.


FAQs

Q: How long does a chimney inspection take?
Most inspections take between 30 minutes to an hour, depending on the level and the system’s condition.

Q: Can I inspect my own chimney?
Basic checks are possible, but only certified professionals can conduct comprehensive inspections with the proper tools and safety precautions.

Q: Do gas fireplaces require inspections too?
Yes. Even though gas burns cleaner, blockages, wear and ventilation issues still require annual checks.

Q: What are the signs my chimney needs urgent inspection?
Smoke backdrafts, strange odors, visible creosote, or cracking sounds when using the fireplace are all red flags.

Q: Is it better to schedule an inspection before winter?
Absolutely. Late summer or early fall is ideal, ensuring your chimney is ready before the burning season begins.


A chimney inspection isn’t just a box to check—it’s a vital part of home maintenance that protects your health, safety, and investment. Whether you’re preparing for winter or just moved into a new home, don’t overlook the importance of regular inspections. Prioritize your peace of mind by scheduling one today.

Regular HVAC Cleaning

Breathe Easy: The Hidden Power of Regular HVAC Cleaning for a Healthier, Happier Home

A perfectly styled home is nice, but true comfort starts with the air you breathe. Often forgotten behind walls and vents, your HVAC system plays a huge role in your daily well-being. Without regular HVAC cleaning, it quietly collects dust, allergens, and even mold, circulating pollutants that harm your health and spike your energy bills. Let’s explore how this simple maintenance task can transform your home’s comfort, air quality, and efficiency.


Air You Can Trust: The Health Benefits of a Clean HVAC System

Your HVAC system circulates air multiple times per day. If it’s dirty, your entire home becomes a delivery system for pollutants. Over time, ducts and filters collect:

  • Dust and dirt
  • Pet hair and dander
  • Pollen and seasonal allergens
  • Mold spores and bacteria

These contaminants compromise your indoor air quality. Without regular HVAC cleaning, sensitive individuals—especially children, seniors, and those with asthma or allergies—are put at risk.

Why Clean Air Matters

Here’s what you gain with clean HVAC air circulation:

  • Relief from allergy and asthma symptoms
  • Better sleep and less fatigue
  • Fewer airborne illnesses
  • A fresher-smelling home

Clean Systems, Clear Savings: How HVAC Maintenance Slashes Energy Costs

Dust buildup in HVAC systems doesn’t just hurt air quality—it hurts your wallet. When components are dirty, the system has to work harder to push air through.

What Happens When You Neglect HVAC Cleaning?

  • Reduced efficiency: More energy is required to achieve the same comfort level.
  • Higher utility bills: Dirt blocks airflow, leading to longer run times.
  • Increased wear and tear: Dirty systems break down faster.

A simple investment in regular HVAC cleaning improves efficiency and helps you avoid surprise breakdowns.


Longevity Matters: Protecting One of Your Home’s Most Valuable Systems

Think of your HVAC system like a car engine. You wouldn’t skip oil changes—so why skip regular maintenance?

Benefits of a Clean HVAC System Over Time

  • Extended equipment life: Clean parts wear less and last longer.
  • Fewer emergency repairs: Remove debris before it causes damage.
  • Preserved warranty: Many warranties require proof of annual servicing.

✅ Pro tip: Schedule regular HVAC cleaning every 6 to 12 months, depending on usage and local climate.


The Mold Menace: How Dirty HVAC Systems Become a Health Hazard

Moisture and organic debris in your ducts and coils are the perfect breeding ground for mold. Once mold spores enter your HVAC system, they’re distributed through every room.

Signs of Mold in Your HVAC System

  • Musty odors when the system runs
  • Frequent respiratory issues indoors
  • Visible mold near vents or drip pans

What a Professional HVAC Cleaning Includes

  • ✅ Inspection for leaks and moisture buildup
  • ✅ Sanitization of coils and drip pans
  • ✅ HEPA-filter vacuuming of duct interiors
  • ✅ Air filter replacement

A clean system is your first defense against mold contamination—and it’s a key reason why regular AC Cleaning should never be skipped.


Often Overlooked: Don’t Forget These Dust-Prone Systems

While central HVAC systems get the most attention, other heating and cooling solutions also benefit from routine maintenance:

  • Ductless mini-splits: Their filters and blower wheels collect grime fast.
  • Baseboard heaters: Dust burns off, creating odors and fire risk.
  • Window units: These harbor mildew and clogged filters if left unchecked.

Keep your entire home’s airflow healthy with regular HVAC cleaning across all systems.


Maintenance Checklist: Your Annual HVAC Cleaning Guide

Stay on top of your system’s health with this quick reference list.

🛠️ Annual HVAC Maintenance Tasks

  • Change air filters every 1–3 months
  • Schedule a professional duct and coil cleaning
  • Check and clean condensate drain lines
  • Inspect insulation and sealing on ductwork
  • Calibrate your thermostat for efficiency

Regular HVAC cleaning not only prevents future problems but ensures you’re living in the cleanest, safest environment possible.


FAQ: Common Questions About Regular HVAC Cleaning

Q1: How often should I have my HVAC system cleaned? A: Experts recommend scheduling regular HVAC cleaning at least once a year. Homes with pets, allergies, or high dust may benefit from biannual service.

Q2: Can I clean my HVAC system myself? A: While you can change filters and clean vents, professional services use specialized tools to access deep inside ducts, coils, and blower motors.

Q3: How much does regular HVAC cleaning cost? A: Prices vary by region and system type but typically range from \$300–\$700. The long-term savings in energy and repairs often outweigh the initial cost.

Q4: Will HVAC cleaning reduce allergies? A: Yes. Removing built-up dust, dander, and mold reduces airborne irritants, creating a healthier indoor environment.

Q5: Is duct cleaning the same as HVAC cleaning? A: Not entirely. Duct cleaning targets the air pathways, while regular HVAC cleaning includes coils, filters, motors, and condensate systems.


Don’t Wait to Clean the Air You Breathe

Breathing clean air shouldn’t be a luxury. Make regular HVAC cleaning a habit—not an afterthought. It’s one of the simplest and most cost-effective ways to protect your family’s health, lower your energy bills, and extend the life of your heating and cooling systems—all while boosting your home service visibility through effective digital marketing.

how do you size a water softener

Unlock the Secret Formula: Sizing Your Water Softener Like a Pro

Understanding Water Softener Sizing

Getting your water softener size just right is like fitting in with Goldilocks, not too big, not too small, but just right. You don’t want problems like not enough softened water or too much wasted salt and water. Let’s make sure you hit that sweet spot for smooth, happy water. Click here

Importance of Proper Sizing

Nailing the size of your water softener is super important to satisfy your home’s needs. A tiny softener will fall behind, letting hard water sneak through, while a bulky one piles up your bills and guzzles water with all that unnecessary regeneration. You’re gonna want the perfect fit—your budget and water bill will thank you, and your shower time might just become your favorite part of the day.

Factors to Consider for Sizing

Before you pick a water softener, check out these crucial factors. Getting a handle on these will steer you in the right direction for finding the best size for your casa:

Factors to Wrap Your Head Around
1. Water Hardness Level: Test your water source to see how hard it is. The tougher the water, the larger softener you’ll need to keep it in line.
2. Household Water Usage: Figure out how much water gets used daily. Count up the folks in your home, the bathrooms, and water-hungry gadgets. All those bubble baths need some planning!
3. Regeneration Frequency: Think about how often you’ll have that softener regenerate. More frequent regenerations might call for a bigger capacity to keep everything running smoothly.
4. Future Needs: Keep an eye on the future. Any new water-sucking appliances on your wishlist, or more family members down the road? Plan ahead to dodge headaches later.

With these tips in hand, you’ll be sizing your water softener like a seasoned pro, making sure it vibes perfectly with your soft water needs. Enjoy your softer, hassle-free water!

Sizing Your Water Softener

Want your water softener to work its magic? You gotta pick the right size to fit your home-sweet-home. Two main things you need to nail down: how hard your water is and how much of it you and your household go through on the regular.

Determining Your Water Hardness Level

First thing’s first, you gotta check how hard your water is. You’re looking at grains per gallon (gpg) or milligrams per liter (mg/L) to measure that stuff. You can test it yourself with a kit or just call up your local water supplier and ask.

Here’s the lowdown on what your test results mean:

Water HardnessWhat It Means
0 – 1 gpgSoft, like a fluffy pillow
1 – 3.5 gpgKinda hard, but still hugs you back
3.5 – 7 gpgNow we’re talking, that’s some stiff water
7 – 10.5 gpgHard as a rock (literally)
Over 10.5 gpgTougher than old boots

Knowing how hardcore your water is helps you figure out what size beast you need to soften it up.

Calculating Your Household’s Water Usage

Next on the list, see how much water your squad uses. Think about how many folks are in your house, how much you all drink, and when you tend to guzzle the most.

Here’s your formula for water-softener-size success:

Water Softener Capacity (grains) = Daily Water Use (gallons) x Water Hardness (gpg)

Let’s say you and your crew go through 250 gallons a day, and your water’s packing 10 gpg:

Daily Water Use (gal)Water Hardness (gpg)Water Softener Capacity (grains)
250102500

With this info, you can slap a perfect-sized water softener in your house so everyone gets that sweet, soft water. No more angry water appliances, and your system lives to see another day.

best way to remove iron from well water

Mastering Iron Filtration: The Best Methods for Well Water

Understanding Iron in Well Water

To deal with iron in well water, you need to know what brings it into the picture, how it affects your health, and what it does to your sinks and machines.

Causes of Iron in Well Water

You’re mostly looking at Earth’s handiwork when talking about iron in well water. Groundwater plays nice with iron-rich rocks and soil, picking up iron bits along the way. Throw in some rusty pipes or fittings, and you’ve got extra iron joining the party in your water supply.

Type of IronWhere It Comes From
Ferrous IronDissolves from your everyday dirt and rocks
Ferric IronGets a boost from air hitting the water

Health Implications of Iron in Drinking Water

Sipping on water with too much iron can mess with your health. Sure, iron is your body’s buddy in moderation, but guzzling down too much via your water can lead to belly aches, tooth stains, and, in the long run, an iron overdose. See More

Iron Level (mg/L)What It Does to You
< 0.3No worries here
0.3 – 0.6Might see some staining
> 1.0Serious staining and possible health woes

Impact of Iron on Household Fixtures and Appliances

High iron levels make their mark all over your place. Sinks, tubs, and toilets could end up with rusty blotches. Doing laundry with iron-rich water? Your clothes might turn a funky color. Not to mention, an iron parade in your water heater or dishwasher can lead to a short-lived and inefficient appliance.

https://qualitywatertreatment.com/pages/solving-your-water-woes-our-ultimate-residential-water-softener-size-chart

Iron Level (mg/L)Effects on Your Home
< 0.3Low to no marks or clogging
0.3 – 1.0Stains start popping up
> 1.0Heavy-duty stains and appliance nightmares

Grasping how iron ends up in your well water, the health risks it poses, and the chaos it causes in your home is key for homeowners who want to fix their water situation and keep their H2O crystal clear.

Effective Methods for Iron Filtration

Got iron in your well water? No sweat! You have multiple routes to tackle the high iron levels lurking in your well. Two of the usual suspects for yanking iron out of your water are oxidizing filtration and ion exchange filtration. Keeping these systems in top shape is key to squeezing the most out of them and making sure they hang around for the long haul.

Oxidizing Filtration Methods

Think of oxidizing filtration as turning sneaky dissolved iron (that invisible water stealer) into visible iron that you can kick out. Handy? You bet! Peek at a few popular oxidizing tricks below:

Oxidizing Filtration MethodDescription
Manganese Dioxide FilterUses manganese dioxide to flip iron and trap it till it can’t do any more harm.
Ozone InjectionPuffs ozone into the mix, making iron particles easier to kick out.
AerationLet’s water mingle with air, causing iron to party up into clumps ready for filtering.

These methods swing on the process of turning iron into solid bits that get easily snagged by the system.

Ion Exchange Filtration Methods

Ion exchange filtration makes iron disappear by swapping it out with other friendly ions. Resin beads, like magic, pull in iron ions and swap ‘em with sodium or potassium. How about that? Here’s a look at the usual ion exchange methods:

Ion Exchange Filtration MethodDescription
Water Softener with Ion Exchange ResinZaps iron by swapping it out for sodium ions nestled in the resin.
Chemical Feeder SystemsIntroduces helpful chemicals to snag iron ions through an exchange dance.
Polyphosphate TreatmentCoats pipes to stop iron from camping out.

These methods work out both observable and lurking iron, cleaning your water right up!

Maintenance Considerations for Iron Filtration Systems

Hold onto your hats because proper upkeep of these filtration gizmos ensures they keep ticking. Keep an eye on these upkeep tips:

  • Regular Inspections: Give your system a once-over often, checking for any leaks or hiccups.
  • Filter Replacement: Switch out filters as advised to keep your system in prime shape.
  • Backwashing: If possible, do regular backwashes to clear out gathered gunk and iron bits.
  • Resin Regeneration: Follow a schedule to reinvigorate the resin in ion exchange setups for best results.

Stick with these upkeep tricks to keep your filtration buddy lasting longer and performing at its best. Regular care not only amps up performance but keeps your water tasting and looking good for everyone at home!